

Merge Tags
Personalise every email with the shopper's name, their cart, the recovery link and more.
A merge tag is a placeholder in your email that ShapedRecover swaps for real details when the email sends. Write "Hi {{customer.first_name}}" and Rina gets "Hi Rina", Sam gets "Hi Sam". Tags work in the subject, the preheader and the body.
How to write a tag
Every tag is a name in double curly braces, made of a group and a field joined by a dot:
{{customer.first_name}}
{{store.name}}
{{cart.product_table}}
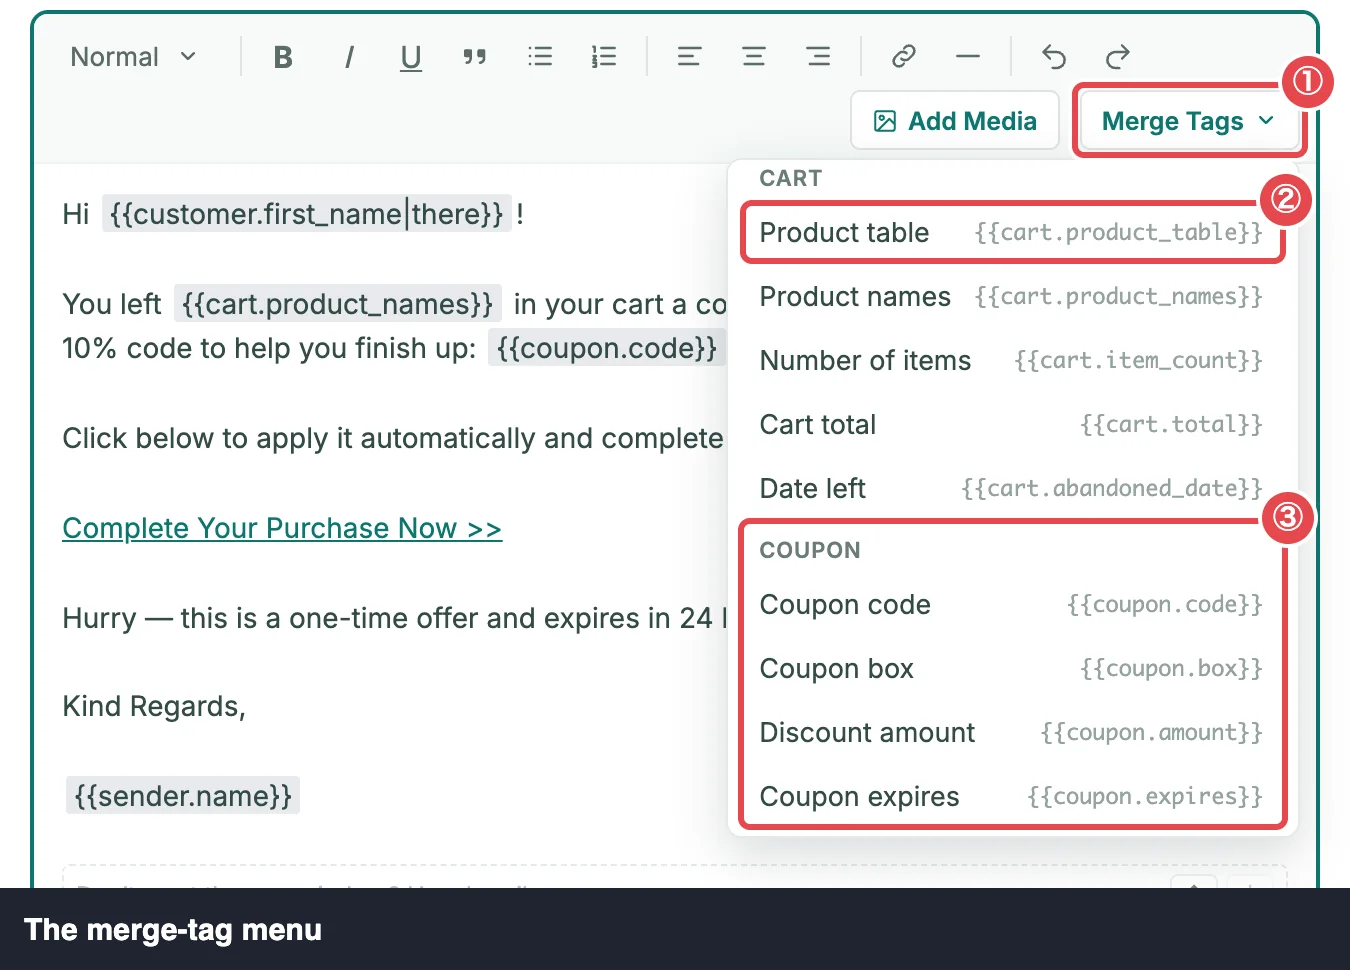
You rarely need to type them. In the Email Editor, click ⋮ at the end of the subject or preheader, or Merge Tags in the body toolbar, and pick one from the menu. It's inserted where your cursor is. In the Visual body, tags show as small chips.
Typed by hand, a tag must be in lowercase, exactly as listed on this page. Spaces just inside the braces are fine.
Fallbacks for missing details
Some details can be empty. A guest might not type a first name, for example. Then the tag sends as nothing, and "Hi {{customer.first_name}}!" becomes "Hi !".
Add a fallback after a vertical bar to say what to use instead:
Hi {{customer.first_name|there}}!| The cart has | The email says |
|---|---|
| First name Rina | Hi Rina! |
| No first name | Hi there! |
The fallback is plain text and is used only when the tag has no value. All three starter campaigns greet shoppers this way. Any tag can take a fallback.
Every tag
The menu groups tags as Customer, Cart, Coupon and Store. Examples use the sample shopper from the preview.
Customer
| Menu label | Tag | Example |
|---|---|---|
| First name | {{customer.first_name}} | Rina |
| Last name | {{customer.last_name}} | Patel |
| Full name | {{customer.full_name}} | Rina Patel |
| Email address | {{customer.email}} | rina@example.com |
Names come from the captured cart. A shopper can leave before typing a name, so these are the tags most likely to be empty. Give them a fallback.
Cart
| Menu label | Tag | Example |
|---|---|---|
| Product table | {{cart.product_table}} | The cart's products with images, prices and a total. Body only. Its look is set by Modify Product Data. |
| Product names | {{cart.product_names}} | Trail Runner v2 and Yoga Mat Pro |
| Number of items | {{cart.item_count}} | 2 (counts quantities, so two of one product counts as 2) |
| Cart total | {{cart.total}} | $182.00, in the cart's currency |
| Date left | {{cart.abandoned_date}} | The day the cart was abandoned, in your site's date format |
Coupon
These appear in the menu only when the campaign has Create a Coupon switched on. They read the personal coupon created for each email. See Coupons in Emails.
| Menu label | Tag | Example |
|---|---|---|
| Coupon code | {{coupon.code}} | The code on its own, to put in a sentence |
| Coupon box | {{coupon.box}} | The code in a styled box. Body only. Added for you when you switch on Create a Coupon. |
| Discount amount | {{coupon.amount}} | 10%, or an amount like $5.00 for a fixed discount |
| Coupon expires | {{coupon.expires}} | in 1 day. Empty if the coupon never expires. |
In a campaign without a coupon, these tags send as nothing.
Store
| Menu label | Tag | Example |
|---|---|---|
| Store name | {{store.name}} | Your site title, from Settings → General in WordPress |
| Store address | {{store.address}} | Your store address from WooCommerce → Settings → General, on one line: address lines, city and postcode (no state or country) |
| Store logo | {{store.logo}} | Your logo, linked to your home page. Body only. |
| Sender name | {{sender.name}} | The From Name in Sending Settings, or WooCommerce's sender name if that's empty. The starters sign off with it. |
The Store logo uses your WooCommerce email header image (WooCommerce → Settings → Emails), or else your theme's site logo, shown at most 180px wide. It follows the alignment of the line it's on, so centre that line to centre the logo. With no logo set anywhere, it shows your store name in bold, so the spot is never empty.
Link and unsubscribe tags
Four tags aren't in the menus, because the editor gives you a better way to use each one:
| Tag | What it is | Use it through |
|---|---|---|
{{cart.restore_url}} | The shopper's personal recovery link, which rebuilds their cart. | Insert link → Customer's cart |
{{store.url}} | Your home page address. | Insert link → Store home page |
{{unsubscribe.line}} | The whole unsubscribe line. Body only. | The Unsubscribe block, always in the body |
{{unsubscribe.link}} | The shopper's unsubscribe address. | Your own unsubscribe link, written in HTML mode |
They still work wherever you write them. Typed into the text, the three address tags print a bare web address, while {{unsubscribe.line}} prints the whole unsubscribe line (and becomes the Unsubscribe block in the Visual body). Inside a link the address tags become a proper, clickable link:
<a href="{{cart.restore_url}}">Finish your order</a>Where each tag works
- Subject and preheader: every tag except the four body only ones (Product table, Coupon box, Store logo and the unsubscribe line). Tags that produce formatted values, like the cart total, are sent as plain text there.
- Body: every tag. The block tags (Product table, Coupon box, Store logo) are inserted on a line of their own.
Unknown tags
If you save a campaign with a tag ShapedRecover doesn't recognise, say a typo like {{customer.firstname}}, the save goes through and the editor lists it in a warning:
Unknown merge tag {{customer.firstname}}
An unknown tag sends as nothing, so fix it before the campaign goes live. A tag typed with capital letters isn't read as a tag at all, and is sent exactly as typed, braces included, so stick to lowercase.
Check with a test
The preview and test emails fill every tag with the sample shopper. If a tag shows up as braces, or a gap you didn't expect, it's misspelled or has no value.
Where to go next
- Email Editor: insert tags and links.
- Email Options: style the product table.
- Coupons in Emails: the coupon tags in use.
- Test Email: see every tag filled in.